Table of Contents
ToggleOutdoor kitchens have shifted from luxury extras to practical extensions of the home. A small outdoor kitchen with bar doesn’t require a sprawling budget or endless square footage, it just needs smart planning. Whether you’re hosting weekend cookouts or simply wanting a place to prep meals and gather with family, a compact outdoor kitchen delivers functionality without overwhelming your yard. This guide walks you through layout strategies, material choices, and feature priorities so you can build something genuinely usable, not just Instagram-friendly.
Key Takeaways
- A small outdoor kitchen with bar transforms your backyard into a functional entertaining space without requiring a sprawling budget or excessive square footage.
- Effective layout planning using a working triangle—grill, prep surface, and sink in close proximity—maximizes usability and prevents cramped movement in compact spaces.
- Weather-resistant materials like stainless steel, concrete, and sealed stone are essential investments that prevent costly replacements and extend the lifespan of your outdoor kitchen.
- A modest bar counter with 3–4 strategically placed stools creates natural gathering spots where guests can socialize while staying connected to the cook.
- Budget $600–$1,200 for a functional bar setup including countertop, stools, and LED lighting, allowing you to achieve quality results in a small outdoor kitchen with bar design.
- Multi-zone bar organization—separating beverage service, appetizer staging, and guest interaction areas—maximizes efficiency and entertainment value in limited space.
Why Build a Small Outdoor Kitchen With Bar
A small outdoor kitchen with bar transforms how you use your backyard. Instead of running back inside for every plate, tool, or drink, everything happens in one spot. You stay connected to guests while prepping food, rather than disappearing into the house. Small kitchens also cost less to build and maintain, fewer appliances, less plumbing, smaller footprints on your foundation or patio.
The bar element adds social value. People naturally gather at a counter with seating. Even a 4-foot run of bar space gives you three to four seats where friends can perch, chat, and grab refreshments. It transforms cooking from a solo chore into an interactive event. Bar seating also works for informal dining, assignments, or snacks without requiring a full outdoor dining table. A modest outdoor kitchen with bar pays for itself in usability and entertainment value, especially for homes with limited yard space.
Essential Design Considerations for Limited Spaces
Layout and Workflow Planning
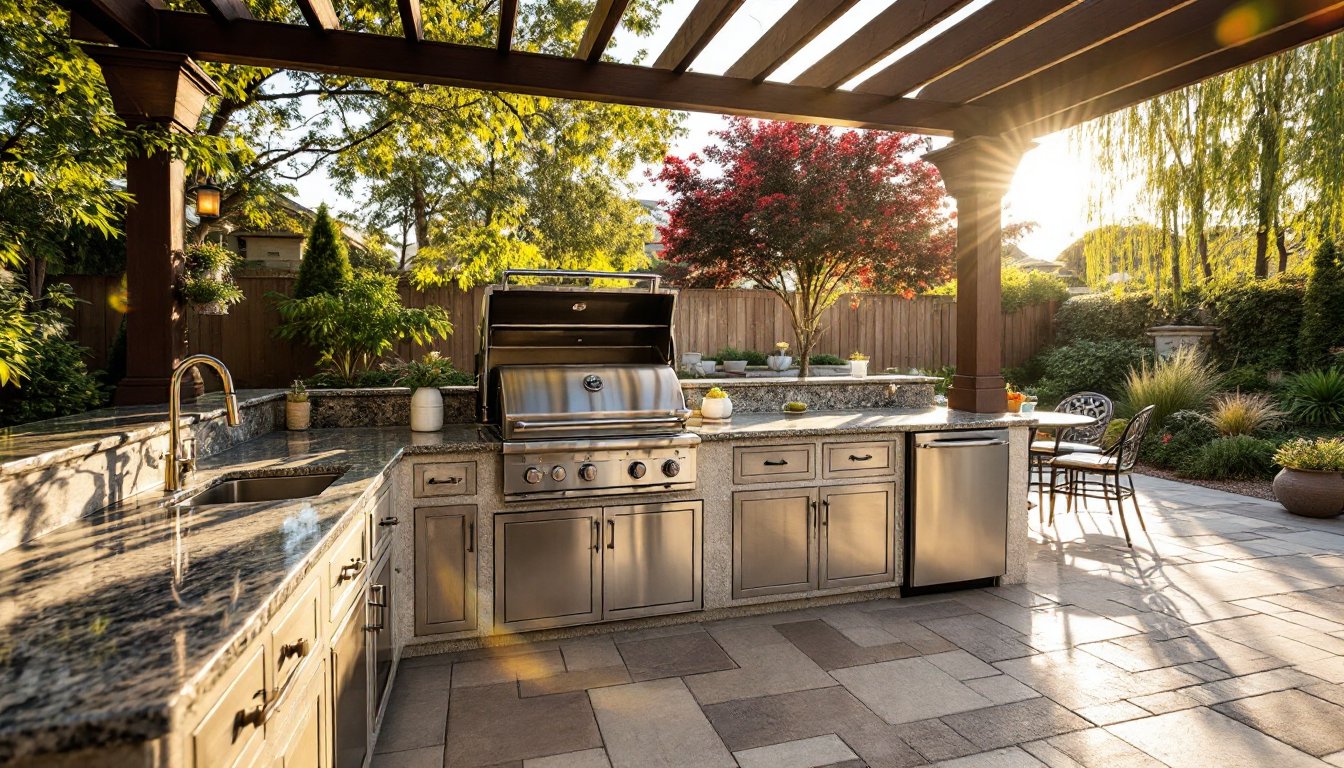
Before you order materials, map your layout on paper or with spray chalk on your patio. Stand in your yard at different times of day and note sun exposure, wind direction, and how foot traffic naturally flows. A small kitchen benefits from a tight “working triangle”, grill, prep surface, and sink close enough that you’re not spinning in circles.
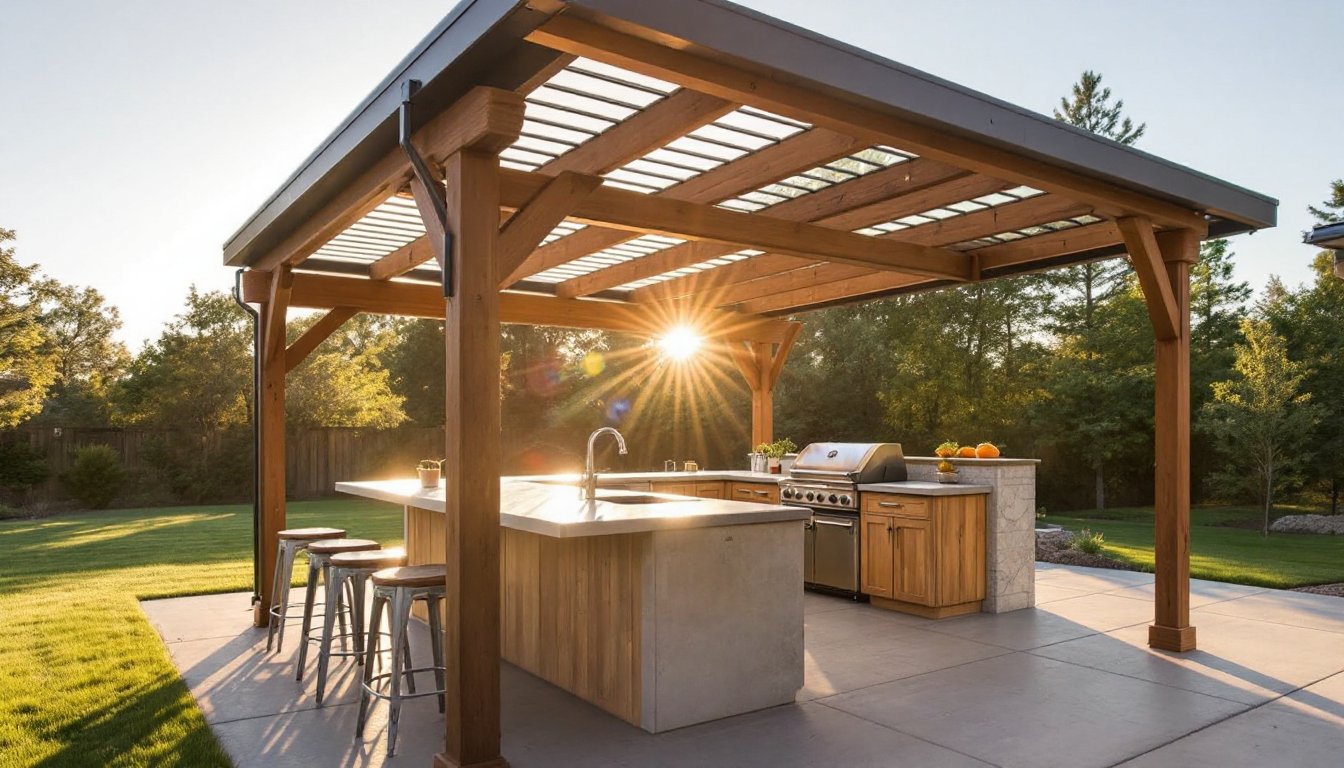
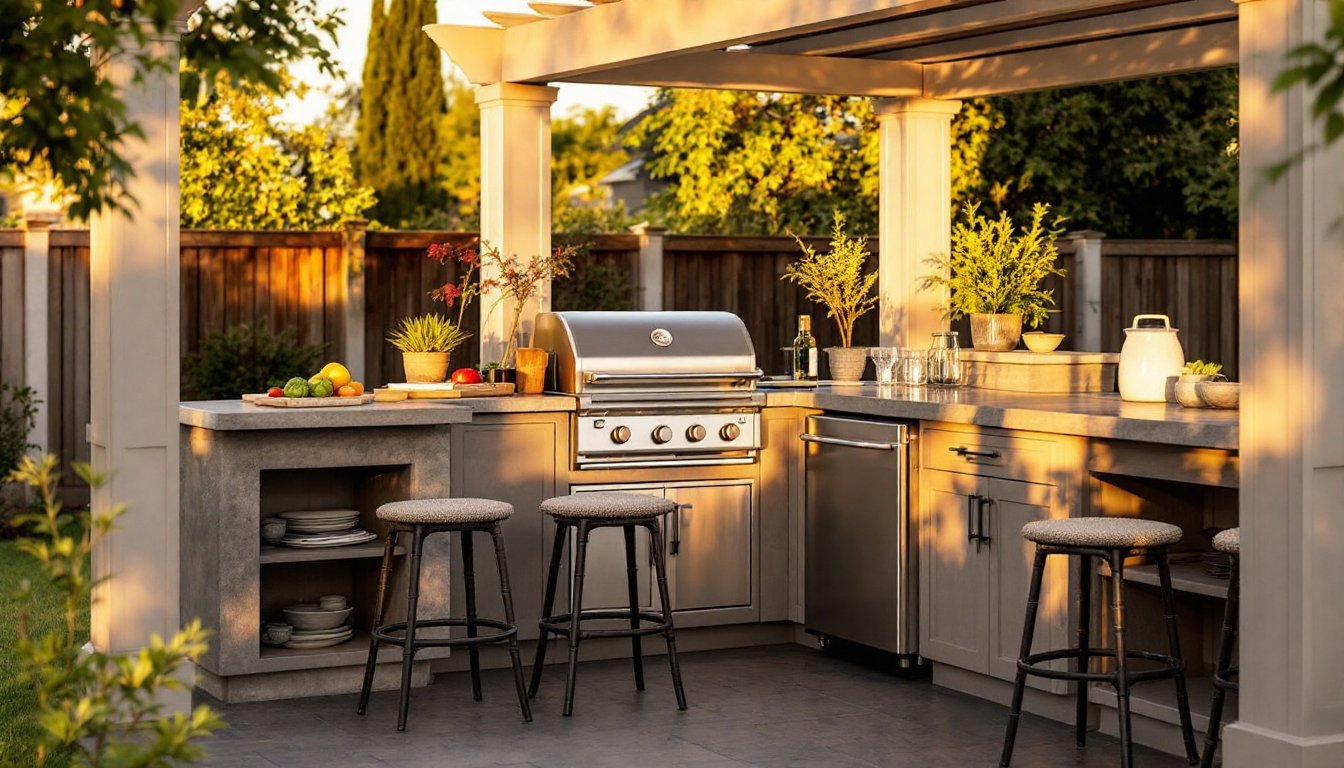
For a 6-foot × 8-foot footprint, orient the bar to face your seating area or house, with the grill and prep counter perpendicular or parallel behind it. This keeps the cook facing guests. Avoid dead-end corners: you’ll waste space and feel cramped. Check overhead clearances too. If you’re planning a pergola or awning (smart for sun protection), ensure it’s high enough that smoke clears and you don’t whack your head reaching overhead shelves. Also verify setback distances from your property line, many jurisdictions require 3 to 5 feet, and some municipalities mandate permits for permanent outdoor cooking structures.
Material Selection and Durability
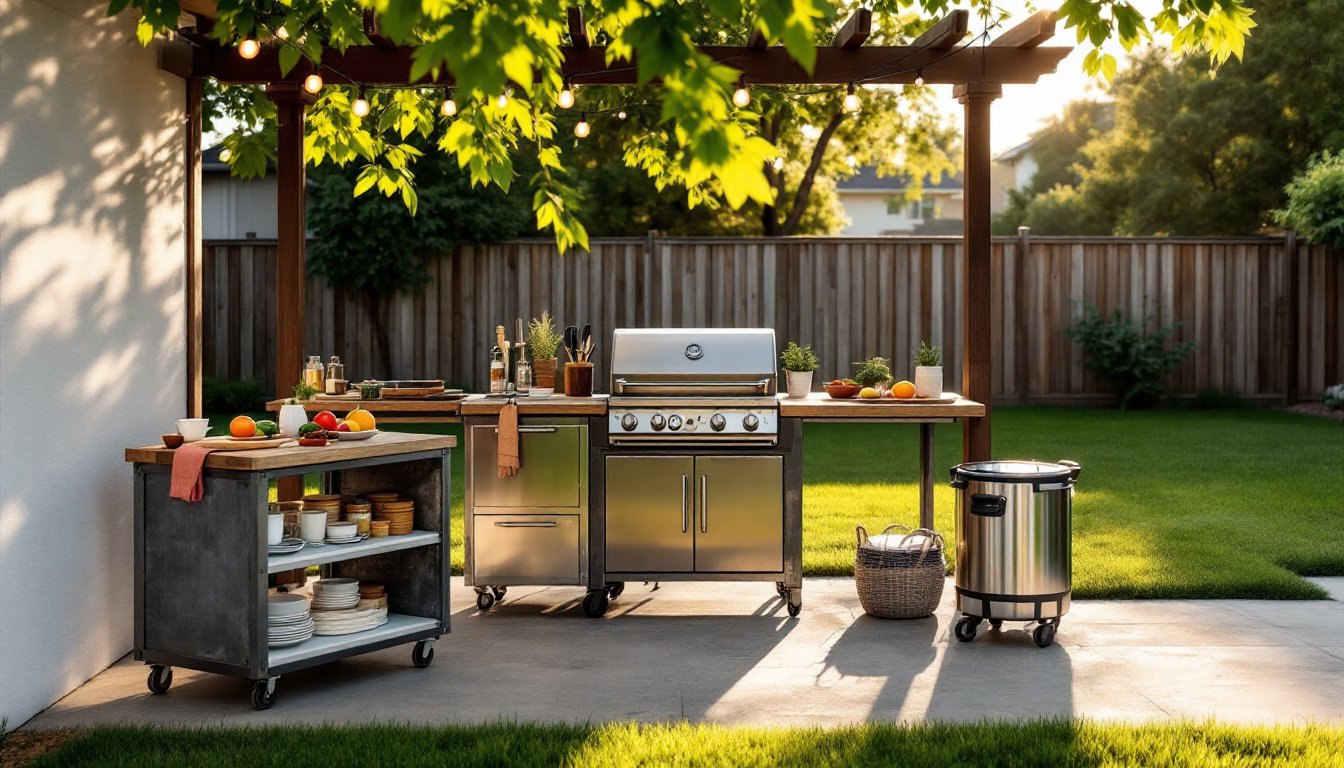
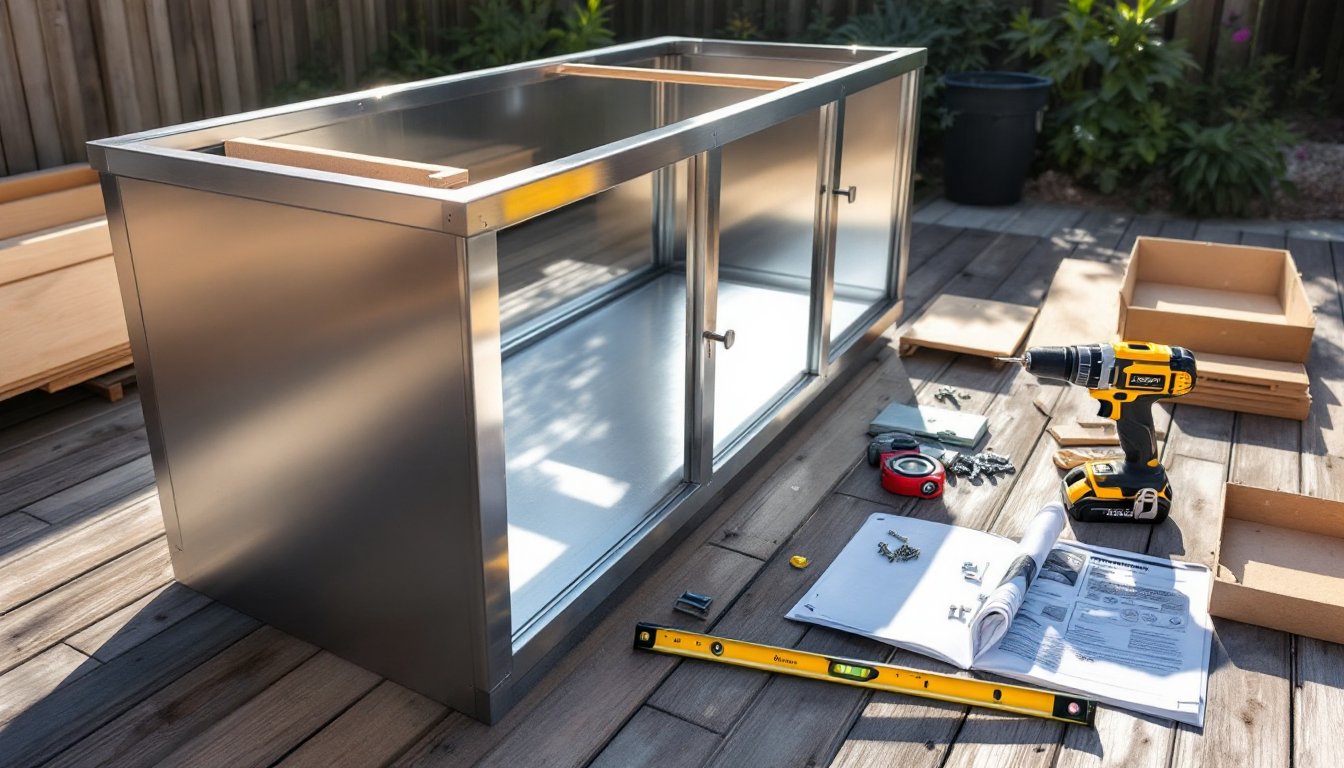
Outdoor kitchens face weather, heat, and heavy use. Materials must resist rot, rust, and fading. Concrete, porcelain pavers, or sealed aggregate work well for countertops and floors, they handle spills, resist staining, and won’t splinter. Stainless steel is standard for appliances and hardware: it’s pricier but won’t rust under salt air or constant moisture.
For structure, pressure-treated lumber resists decay, but composite decking or aluminum framing avoid ongoing maintenance. Wood frames need regular sealing. Tile or stone backsplashes look good and protect walls from splashing and grease. Avoid materials like untreated particle board or uncoated mild steel, they’ll degrade fast. Budget matters, but skimping on weather-resistant materials wastes money later when you’re replacing rotted supports or rusted hardware. Outdoor Living Examples to Transform Your Backyard showcase materials that stand up to the elements over many seasons.
Key Features and Equipment to Include
Cooking and Prep Zones
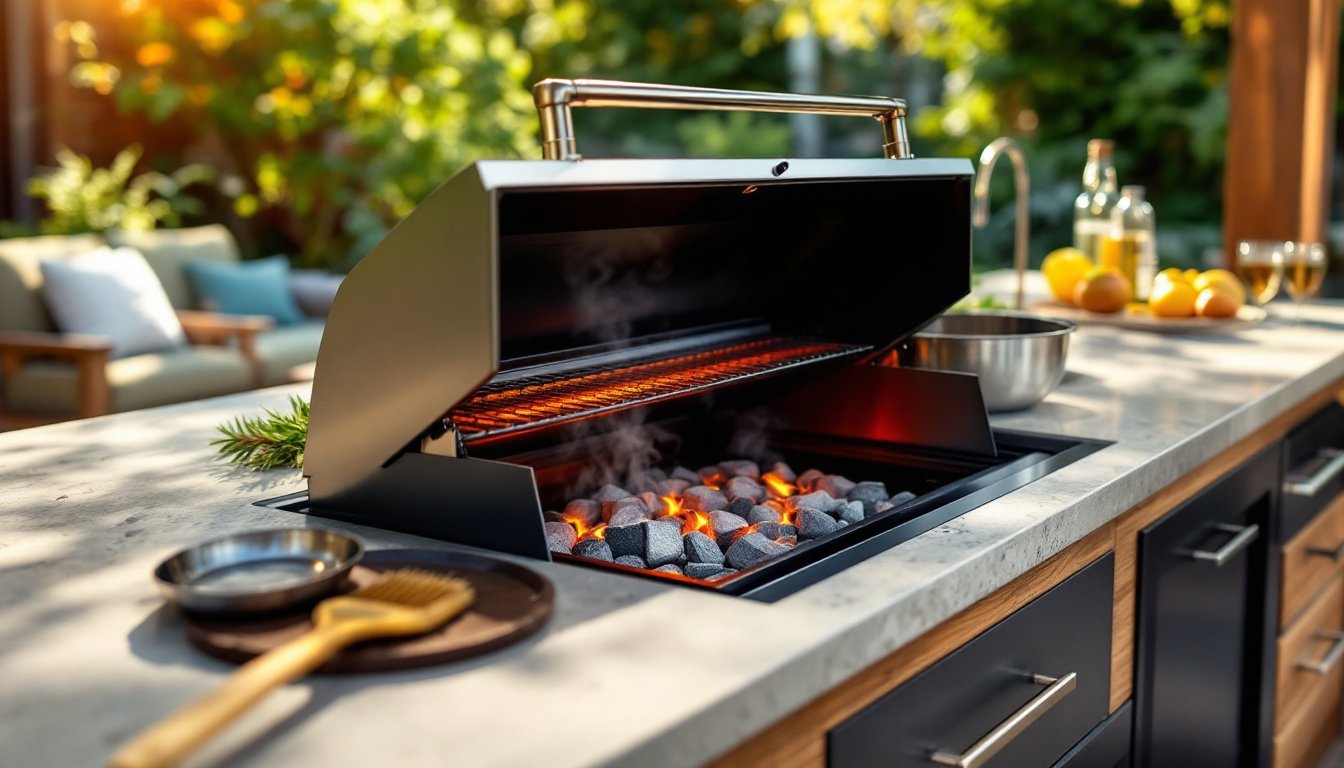
Start with a grill, either built-in or freestanding. A 30-inch grate is standard for small kitchens: anything smaller feels cramped when you’re cooking for a crowd. Built-in grills (gas or charcoal) are permanent and look polished, but they cost $400–$1,500 depending on quality. Freestanding grills offer flexibility: if you relocate or want to try different gear, you’re not locked in. A weatherproof cover extends grill life by years.
Countertop space is non-negotiable. You need at least 2 feet of prep surface beside the grill for cutting, plating, and staging ingredients. Stainless steel surfaces are easy to sanitize and don’t absorb grease. Concrete counters work but need sealing annually. If budget is tight, a solid wood butcher block (treated for outdoor use) costs less but requires more maintenance.
A compact side burner lets you simmer sauces or heat water without firing up the main grill. Some kitchens skip it to save space and cost, but it’s genuinely useful. Seating for the bar matters as much as cooking equipment. Bar stools with weather-resistant cushions and backs create real seating comfort, not just function. A 4-foot bar accommodates 3–4 stools comfortably: 6 feet gives you 4–5. Stagger seating heights slightly (24-inch stools for 36-inch counters, 30-inch stools for 42-inch counters) so people can see each other. Top Outdoor Living Ideas detail how seating layouts influence gathering and flow.
Bar Integration and Seating Options
A bar isn’t just seating, it’s a multi-zone counter. Dedicate one section to beverage service (bottle storage, ice bucket, glassware), another to snacking or appetizer staging, and keep the rest clear for guest interaction. A mini fridge underneath the bar keeps drinks cold without running indoor electrical lines (consider a small propane or solar cooler if wiring seems daunting). Open shelving or a low cabinet below the bar hides clutter while keeping supplies within reach.
Stool selection shapes how inviting your bar feels. Look for models with UV-resistant wicker, aluminum frames, or powder-coated steel, avoid bare wood or untreated fabric. Removable cushions let you wash covers and store cushions indoors during off-season. Height matters: standard bar height is 42 inches, so 30-inch stools work best (leaving 12 inches of leg room underneath). If your bar is 36 inches (counter height), use 24-inch stools.
Backlighting or under-counter lighting makes the bar feel like a real entertainment space and extends usable hours into evening. Low-voltage LED strips are affordable, easy to install, and consume minimal power. A simple pergola or shade sail above the bar prevents glare and keeps guests cooler during long afternoons. How to Create the Perfect Outdoor Living Space walks through adding these comfort layers that make people actually want to spend time in your yard. Budget $600–$1,200 for a functional bar countertop, stools, and basic lighting in a small kitchen.