Table of Contents
ToggleA built-in smoker transforms your <a href="https://curry-chef.com/outdoor-living-ideas/”>outdoor kitchen from a grilling station into a year-round entertainment hub. Unlike a standalone barrel or offset smoker parked on a patio, an integrated unit becomes part of your kitchen’s infrastructure, it’s protected by the same roof overhang, shares counter space with prep surfaces, and drains properly with the rest of your outdoor plumbing. Homeowners who add a built-in smoker often find they use their outdoor space far more frequently, whether they’re smoking a brisket for Sunday dinner or hosting friends for a low-and-slow cookout. This guide walks you through selecting the right unit, planning the layout, and handling installation yourself if you’re comfortable with basic construction and plumbing work.
Key Takeaways
- A built-in smoker transforms your outdoor kitchen into a year-round entertaining hub by integrating it into your kitchen’s infrastructure with proper weather protection, ventilation, and workflow efficiency.
- Choose between offset, vertical, or pellet smokers based on your space constraints and cooking style—vertical and pellet models work best for built-in applications where space is tight.
- Proper planning is essential: measure your footprint (2-4 feet wide, 2-3 feet deep), ensure adequate clearance for heat circulation, and install adequate ventilation or range hood systems before construction begins.
- A level foundation, secure framing, high-temperature caulking, and compliant ventilation are non-negotiable for safe installation and proper grease drainage.
- Regular maintenance—including ash removal, door gasket inspection, quarterly hood cleaning, and seasonal rust checks—keeps your built-in smoker reliable and extends its lifespan for decades of use.
Why Add a Built-In Smoker to Your Outdoor Kitchen
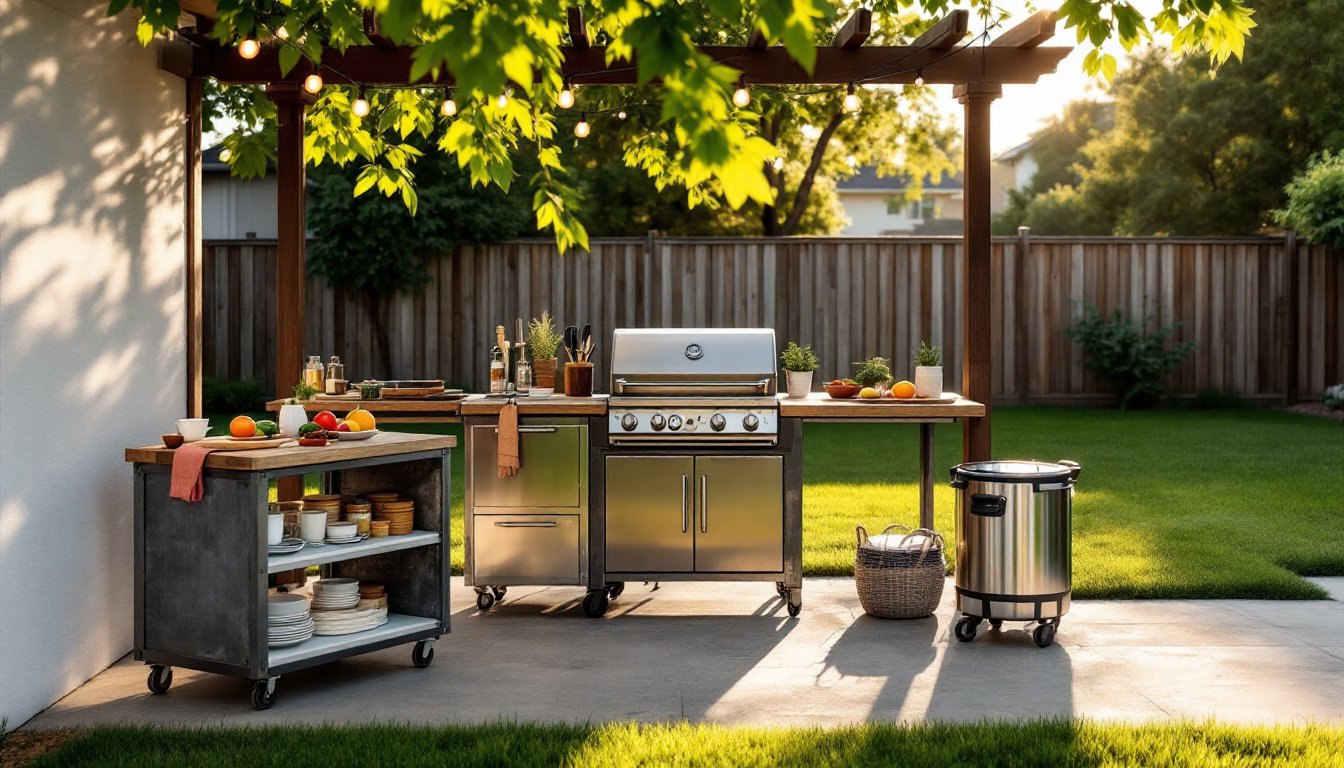
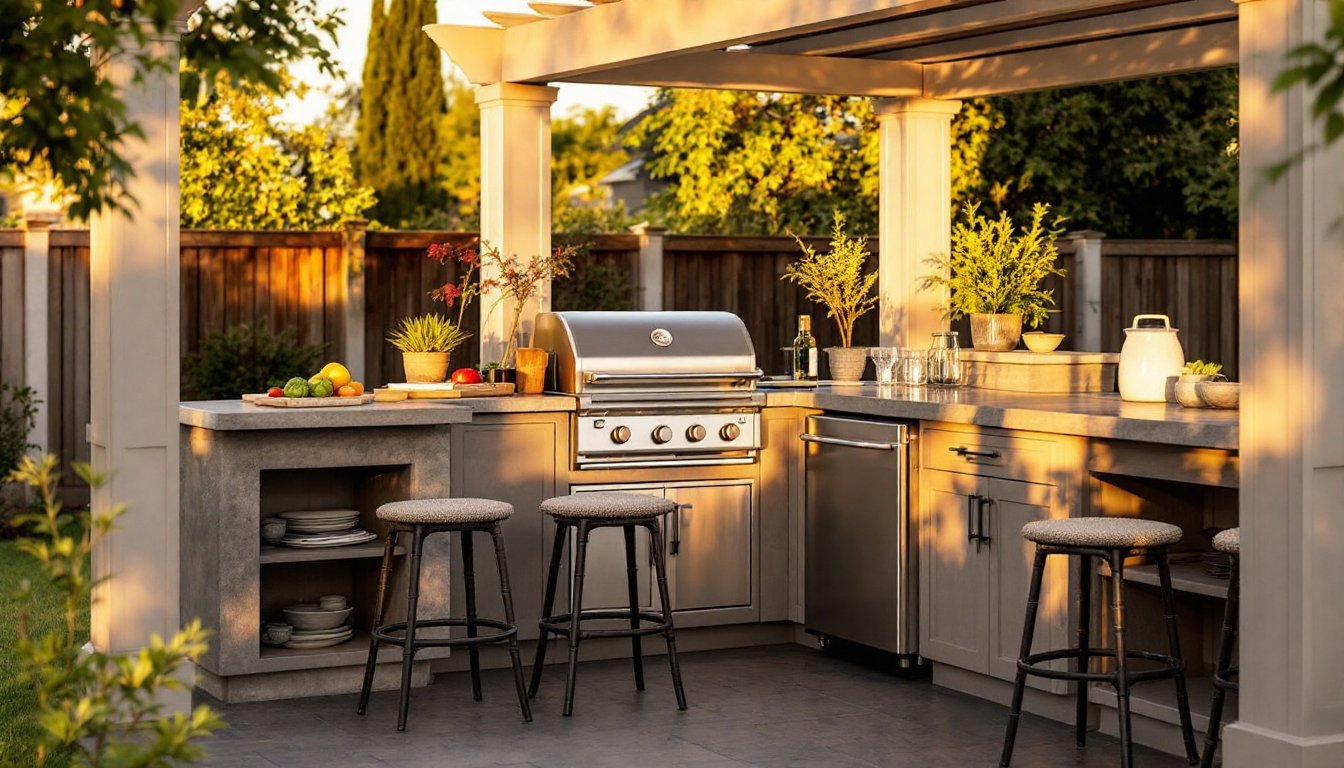
A built-in smoker anchors your outdoor living space and elevates it beyond casual grilling. Unlike a moveable offset or kettle smoker, a permanent installation means consistent placement, stable fuel delivery, and dedicated ventilation overhead. When you’re serious about low-and-slow cooking, you’ll appreciate having a unit that stays tuned and ready.
Integration also solves workflow problems. Prep happens on the main counter, the smoker occupies a sheltered zone within arm’s reach, and cleanup happens at a nearby sink. This beats dragging a portable unit across the lawn or fighting wind exposure on an open deck. Many homeowners find that Top Outdoor Living Ideas like integrated cooking zones spark more frequent entertaining and family gatherings. Beyond lifestyle, a well-built outdoor kitchen component holds value: potential buyers recognize the craftsmanship and function.
Weather protection matters, too. A built-in smoker tucked under an awning or pergola roof stays drier and lasts longer. The grates and interior seasonings aren’t exposed to rain between cookouts, so your maintenance window widens.
Choosing the Right Smoker Type and Size for Your Space
Before ordering or building, decide what kind of smoker fits your kitchen layout and cooking style. Size matters, a large offset barrel might be stunning but consume half your counter footprint. Think about how many people you typically cook for and how much space you’re willing to sacrifice.
Measure your allotted opening or counter area first. Most built-in units fit into a 2-4 foot width and 2-3 foot depth. Factor in at least 6-12 inches of clearance on all sides for heat and smoke circulation. Also confirm that overhead ventilation or a hood can be installed above it: smoke and heat have to go somewhere, and building code inspectors will want to see a proper exhaust plan.
Offset vs. Vertical vs. Pellet Smokers
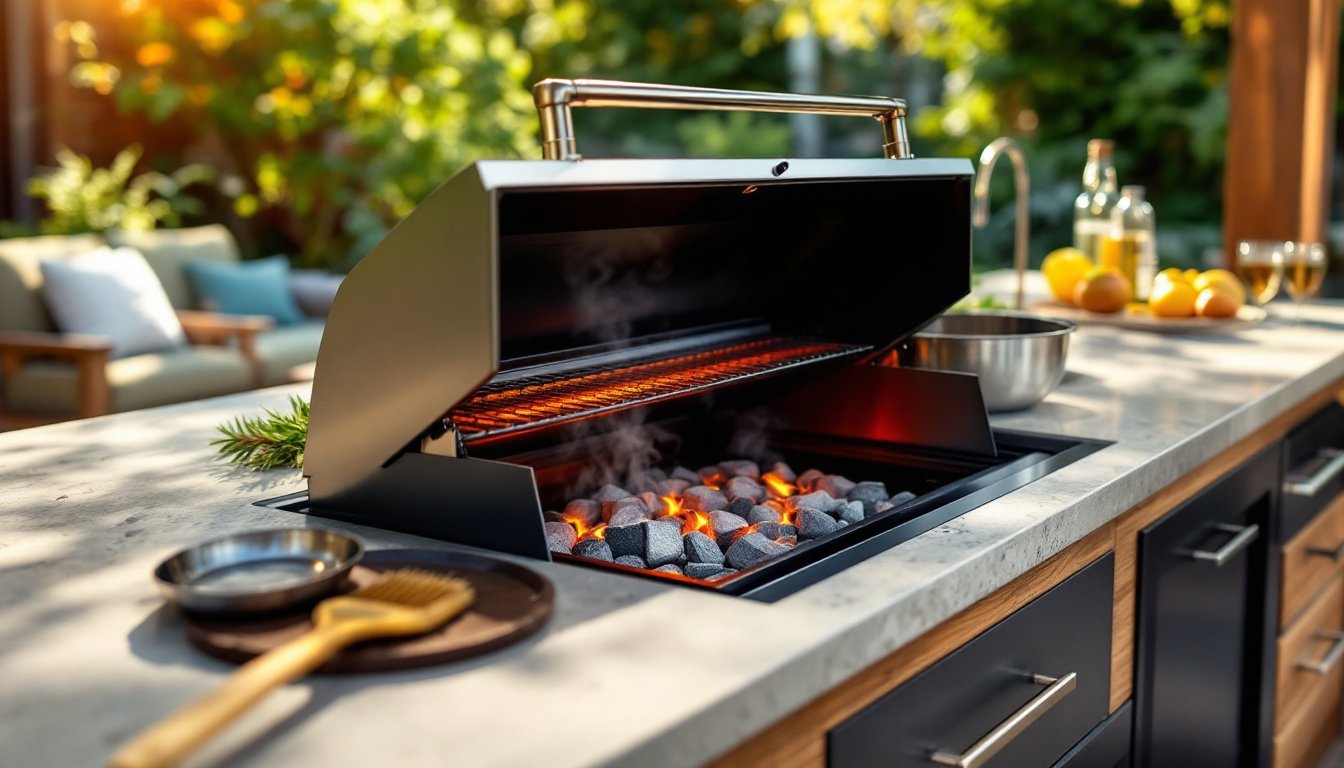
Offset smokers are the classic horizontal firebox-and-chamber design. They hold heat and smoke well, cook low-and-slow reliably, and are iconic for barbecue. Downside: they’re bulky, require a dedicated firebox foundation, and demand more active fuel management during long cooks.
Vertical smokers (barrel or drum style) are compact and efficient. They stack food on multiple grates, which means you cook more volume in less footprint. They’re ideal for built-in applications where space is tight. Heat distribution is less even than an offset, but temperature control is simpler.
Pellet smokers use automatic auger-fed hardwood pellets and a digital thermostat. Setup is easier, you load pellets, set your target temp, and walk away for hours. Downside: they need electricity, are more complex if something breaks, and some purists argue they lack character. For a built-in kitchen, a pellet unit’s plug-and-forget reliability can be a huge advantage.
Professional outdoor kitchen designs often feature integrated pellet or vertical models because they fit tighter spaces and integrate with gas lines or electrical infrastructure.
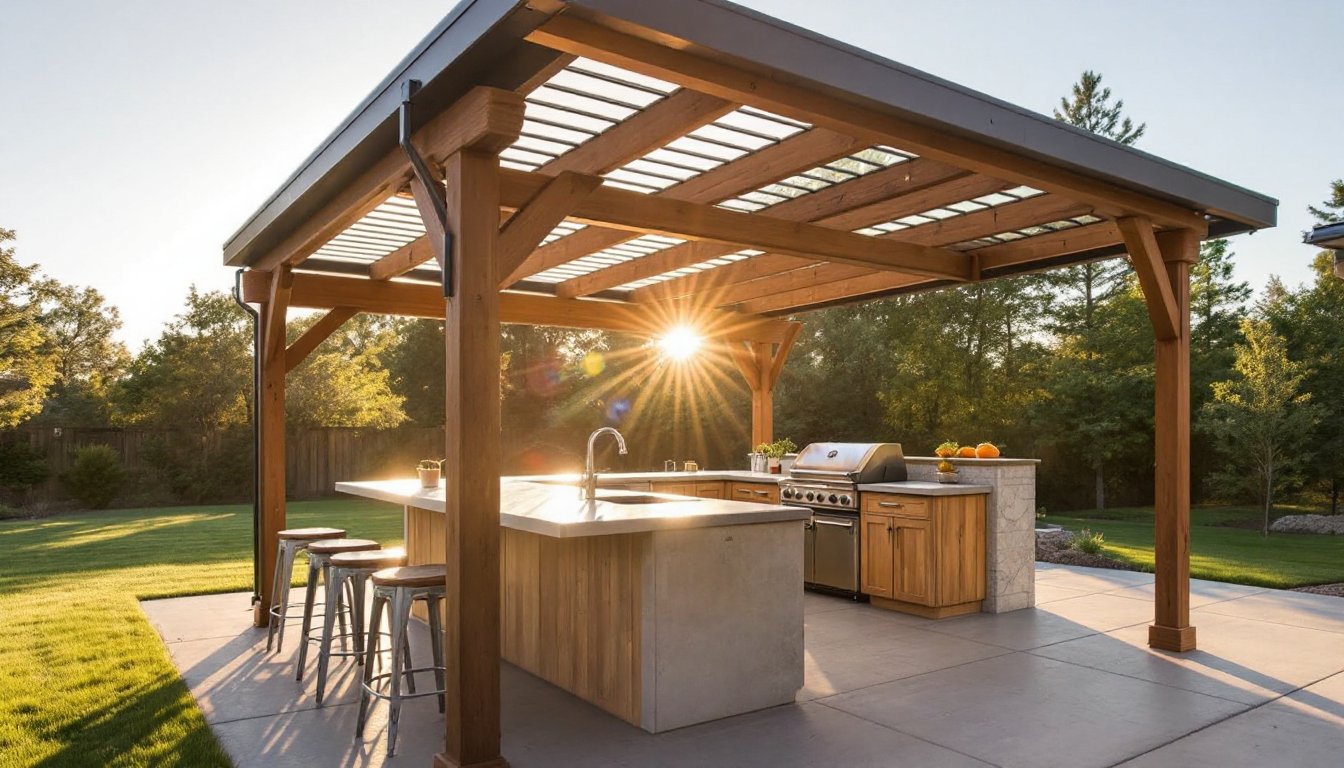
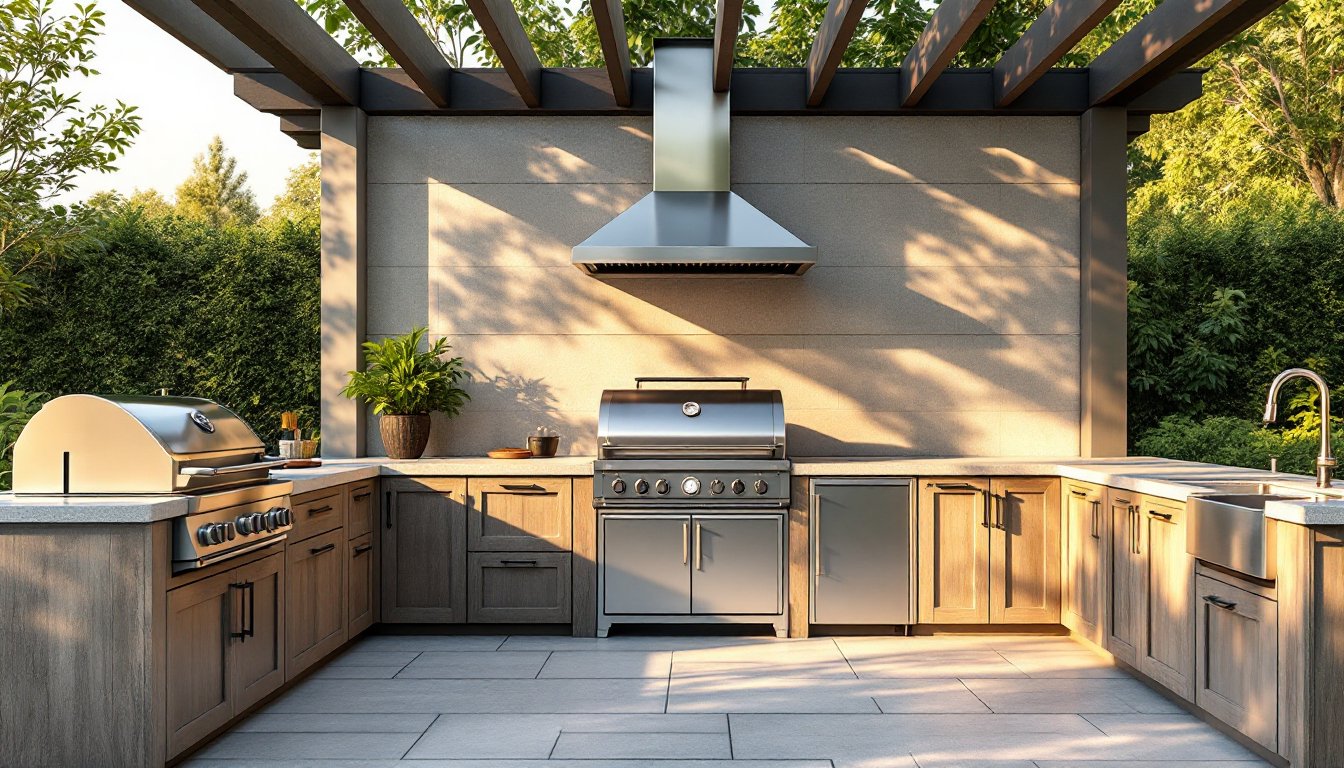
Planning Your Layout and Ventilation Needs
Layout is not just about aesthetics: it’s about workflow and safety. Your smoker should sit at a comfortable height, typically 36-42 inches from the ground, aligned with your other cooking surfaces. The loading door shouldn’t face prevailing winds, or smoke will blow sideways into your face.
Work with a site plan. Sketch your deck, patio, or pergola footprint. Mark the position of the smoker in relation to the kitchen counter, prep zone, and seating area. Ensure foot traffic doesn’t pass directly in front of the unit. Consider proximity to a water source for cleanup and fire safety.
Ventilation is critical and non-negotiable. Smoke needs somewhere to exit, or it’ll pool under a pergola roof and make everyone uncomfortable. A range hood or custom hood duct system pulls smoke upward and away. Most codes require at least 18-24 inches of clearance above the cooking surface before ductwork starts. If you’re under a solid roof or pergola with cross beams, plan for the hood to be 5-8 feet high at minimum, vented to the outside or dispersed at roof level.
If your location requires permits (most structural outdoor kitchens do), check with your local building department early. They’ll specify setbacks from property lines, roof clearances, and gas or electrical runs. Permits delay projects 2-6 weeks, but skipping them invites code violations when you sell. Outdoor Living Examples often showcase compliant installations that balance aesthetics with safety.
Essential Materials and Tools for Installation
Materials:
• Built-in smoker unit (offset, vertical, or pellet model, confirm exact dimensions)
• Concrete or composite deck frame/foundation (typically 4×4 posts and 2×12 joists, depending on codes)
• Stainless steel flashing and weather sealing (silicone caulk rated for high heat)
• Gas line (if pellet unit) or chimney pipe/ductwork for smoke exhaust
• Countertop substrate (concrete, tile, or stainless steel)
• Mortar, grout, or epoxy sealant (if tiling)
Tools:
• Level (24 inches, essential for proper drainage and heat flow)
• Tape measure and carpenter’s square
• Circular saw or miter saw (for framing lumber)
• Cordless drill and impact driver
• Adjustable wrench and socket set (for hardware)
• Caulking gun and caulk (high-temp silicone)
• Safety gear: work gloves, safety glasses, dust mask, steel-toed boots
If you’re not confident with carpentry or gas line work, hire a contractor for framing and gas installation. A licensed plumber or gas fitter may be required by code anyway. You can handle finishing work like caulking, painting, or staining afterward.
Step-by-Step Installation Process
1. Prepare and Level the Foundation
Clear the installation area and inspect the deck or patio base. The surface must be level to within 1/4 inch over 10 feet. If your deck is older or uneven, add shims or pour a concrete pad (4-6 inches thick, reinforced with rebar). Use your level constantly, a tilted smoker won’t drain grease properly and heat distribution suffers.
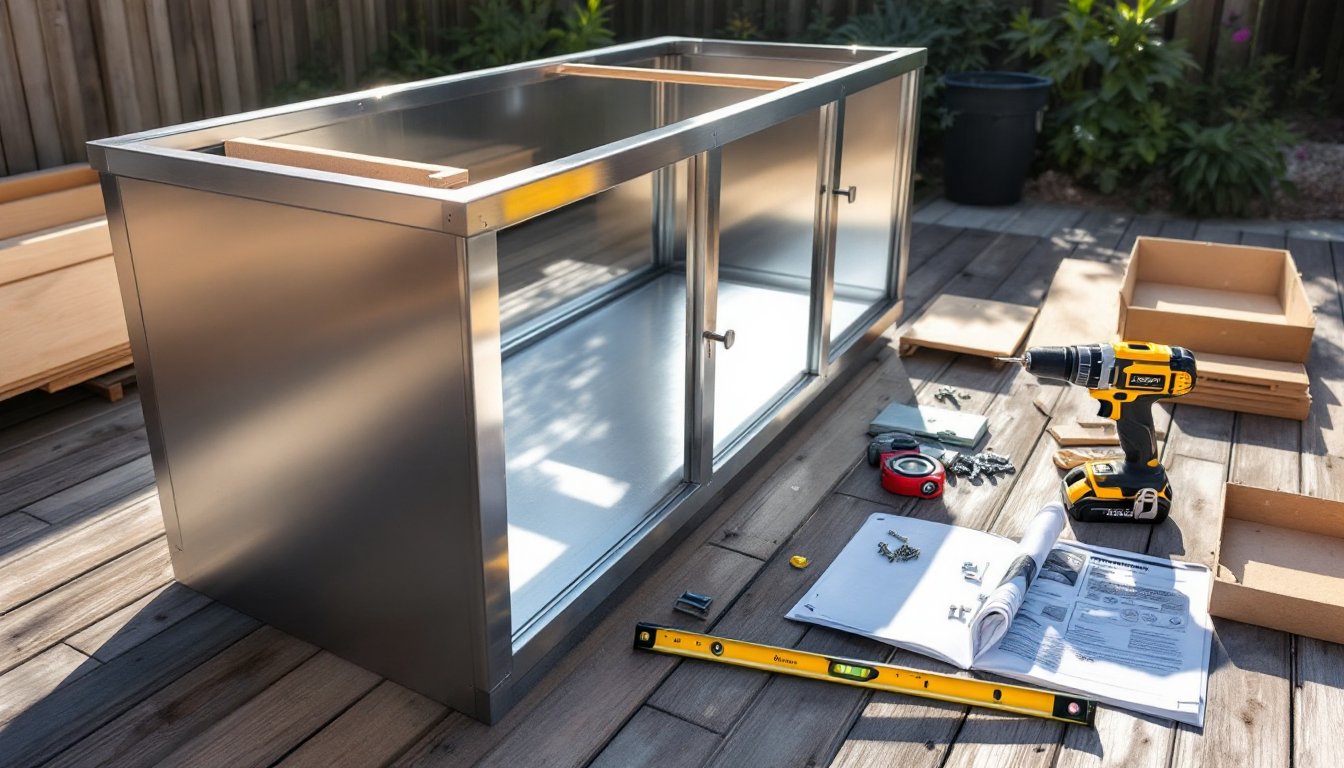
2. Construct the Surround Frame
Frame out the cavity where the smoker sits using pressure-treated lumber (4×4 posts or 2×12 rim joists, depending on your design). Bolt or lag-screw the frame to the deck structure. The opening must match your smoker’s footprint with about 1/2-inch clearance on all sides for thermal expansion. Brace the frame with diagonal bracing if it extends more than 2 feet beyond existing structure.
3. Set and Secure the Smoker
Carefully lower the unit into place using helpers and, if the unit is heavy (over 200 pounds), a dolly or hand truck. Ensure it sits level and flush against the frame. Bolt it down at designated points, do not skip this. Heat and vibration can shift an unsecured unit.
4. Seal Gaps and Gaps Caulk
Apply high-temperature silicone caulk (rated to 500°F minimum) around all gaps between the smoker, frame, and surrounding surfaces. This prevents moisture and insects from entering joints. Allow caulk to cure per manufacturer specs, usually 24-48 hours before firing up.
5. Install Ventilation
Connect chimney pipe or range hood ductwork to the smoker’s rear or top exhaust port. Secure all connections with stainless steel bands or clamps. Run the duct straight up and out, or angle it gently, sharp bends trap smoke and reduce draft. If venting through a roof, use a proper flashing boot and seal it with roof cement.
6. Finish the Surround and Counter
Add your countertop material (tile, concrete, or stainless steel). If tiling, use a concrete backer board and thin-set mortar rated for exterior use. Grout with a urethane grout for durability. Let everything cure fully before exposing it to heat and moisture.
7. Test the System
Before your first cook, run a 15-minute test with low heat. Watch for smoke leaks, check that the unit heats evenly, and confirm the hood captures smoke properly. Make any adjustments to venting or seals before hosting guests.
Maintenance Tips to Keep Your Built-In Smoker in Top Condition
Regular upkeep extends the life of your smoker and keeps it cooking reliably. After each use, scrape out ash and grease buildup from the grates and floor. Most offset and vertical smokers have a grease drain port at the bottom, clean it monthly to prevent blockage and unwanted drips.
Inspect the firebox, grates, and thermometer every season. Look for rust, loose bolts, or cracks. Spray rusted bolts with penetrating oil and replace grates if they’re pitted or warped. Recheckthe seal around the door and lid gasket: if it’s compressed or cracked, replace it to maintain consistent temperature.
Clean the exhaust stack and hood quarterly, especially if you cook frequently. Creosote buildup reduces draft and traps heat. Use a stiff brush and chimney rods (same tools you’d use for a fireplace chimney). If your unit is pellet-fired, empty the hopper before long storage periods, run out the auger, and inspect the combustion chamber for blockages.
Invest in a high-quality cover if your smoker isn’t under a roof. A good breathable cover prevents rain pooling while allowing moisture to escape. Secure it with tie-downs so wind doesn’t whip it off. During winter months in freeze-thaw regions, consider draining any water lines that feed nearby fixtures. Party-ready specialty outdoor kitchen features often highlight high-maintenance units that reward consistent care with decades of service.
If you notice persistent temperature swings, leaks, or rust that spreads even though treatment, consult a smoker technician. Small issues grow into expensive repairs fast in an outdoor environment.